Fermented Habanero Honey Garlic
This is, of course a small batch, you can definitely double or triple the recipe. This takes around 1 month for the fermentation period to be done, but you can start eating and using the garlic, habanero and honey after the first week and a half. I recommend checking the pH after the first week to ensure it is under 4.6 to be safe to consume.
Ingredients:
1 head garlic
3 habaneros
1-1/2 c raw unfiltered honey (use local honey if possible with a 4.6 pH or lower)
1 stick cinnamon
Raw apple cider vinegar (optional)
Tools needed:
Cutting board
Sharp knife
Rubber gloves
***The following link is an amazon associate link. As an Amazon Associate I earn from qualifying purchases, I make a small commission if purchased at not extra cost to you.
How to make it:
Always check the pH of the honey before fermenting since some honeys may be higher than 4.6.
Separate the garlic cloves and peel the outer paper layer. I find it easier to remove by lightly smashing the garlic on the cutting board. The lightly smashed garlic will help the fermentation process start a little quicker from my experience as the juices from the garlic get released and into the honey easier.
Wash the habaneros and slice thin. Pull stem off the peppers.
If the honey is thick because it is colder, you can place the honey container in a bowl of warm water for a few minutes to make it more pourable.
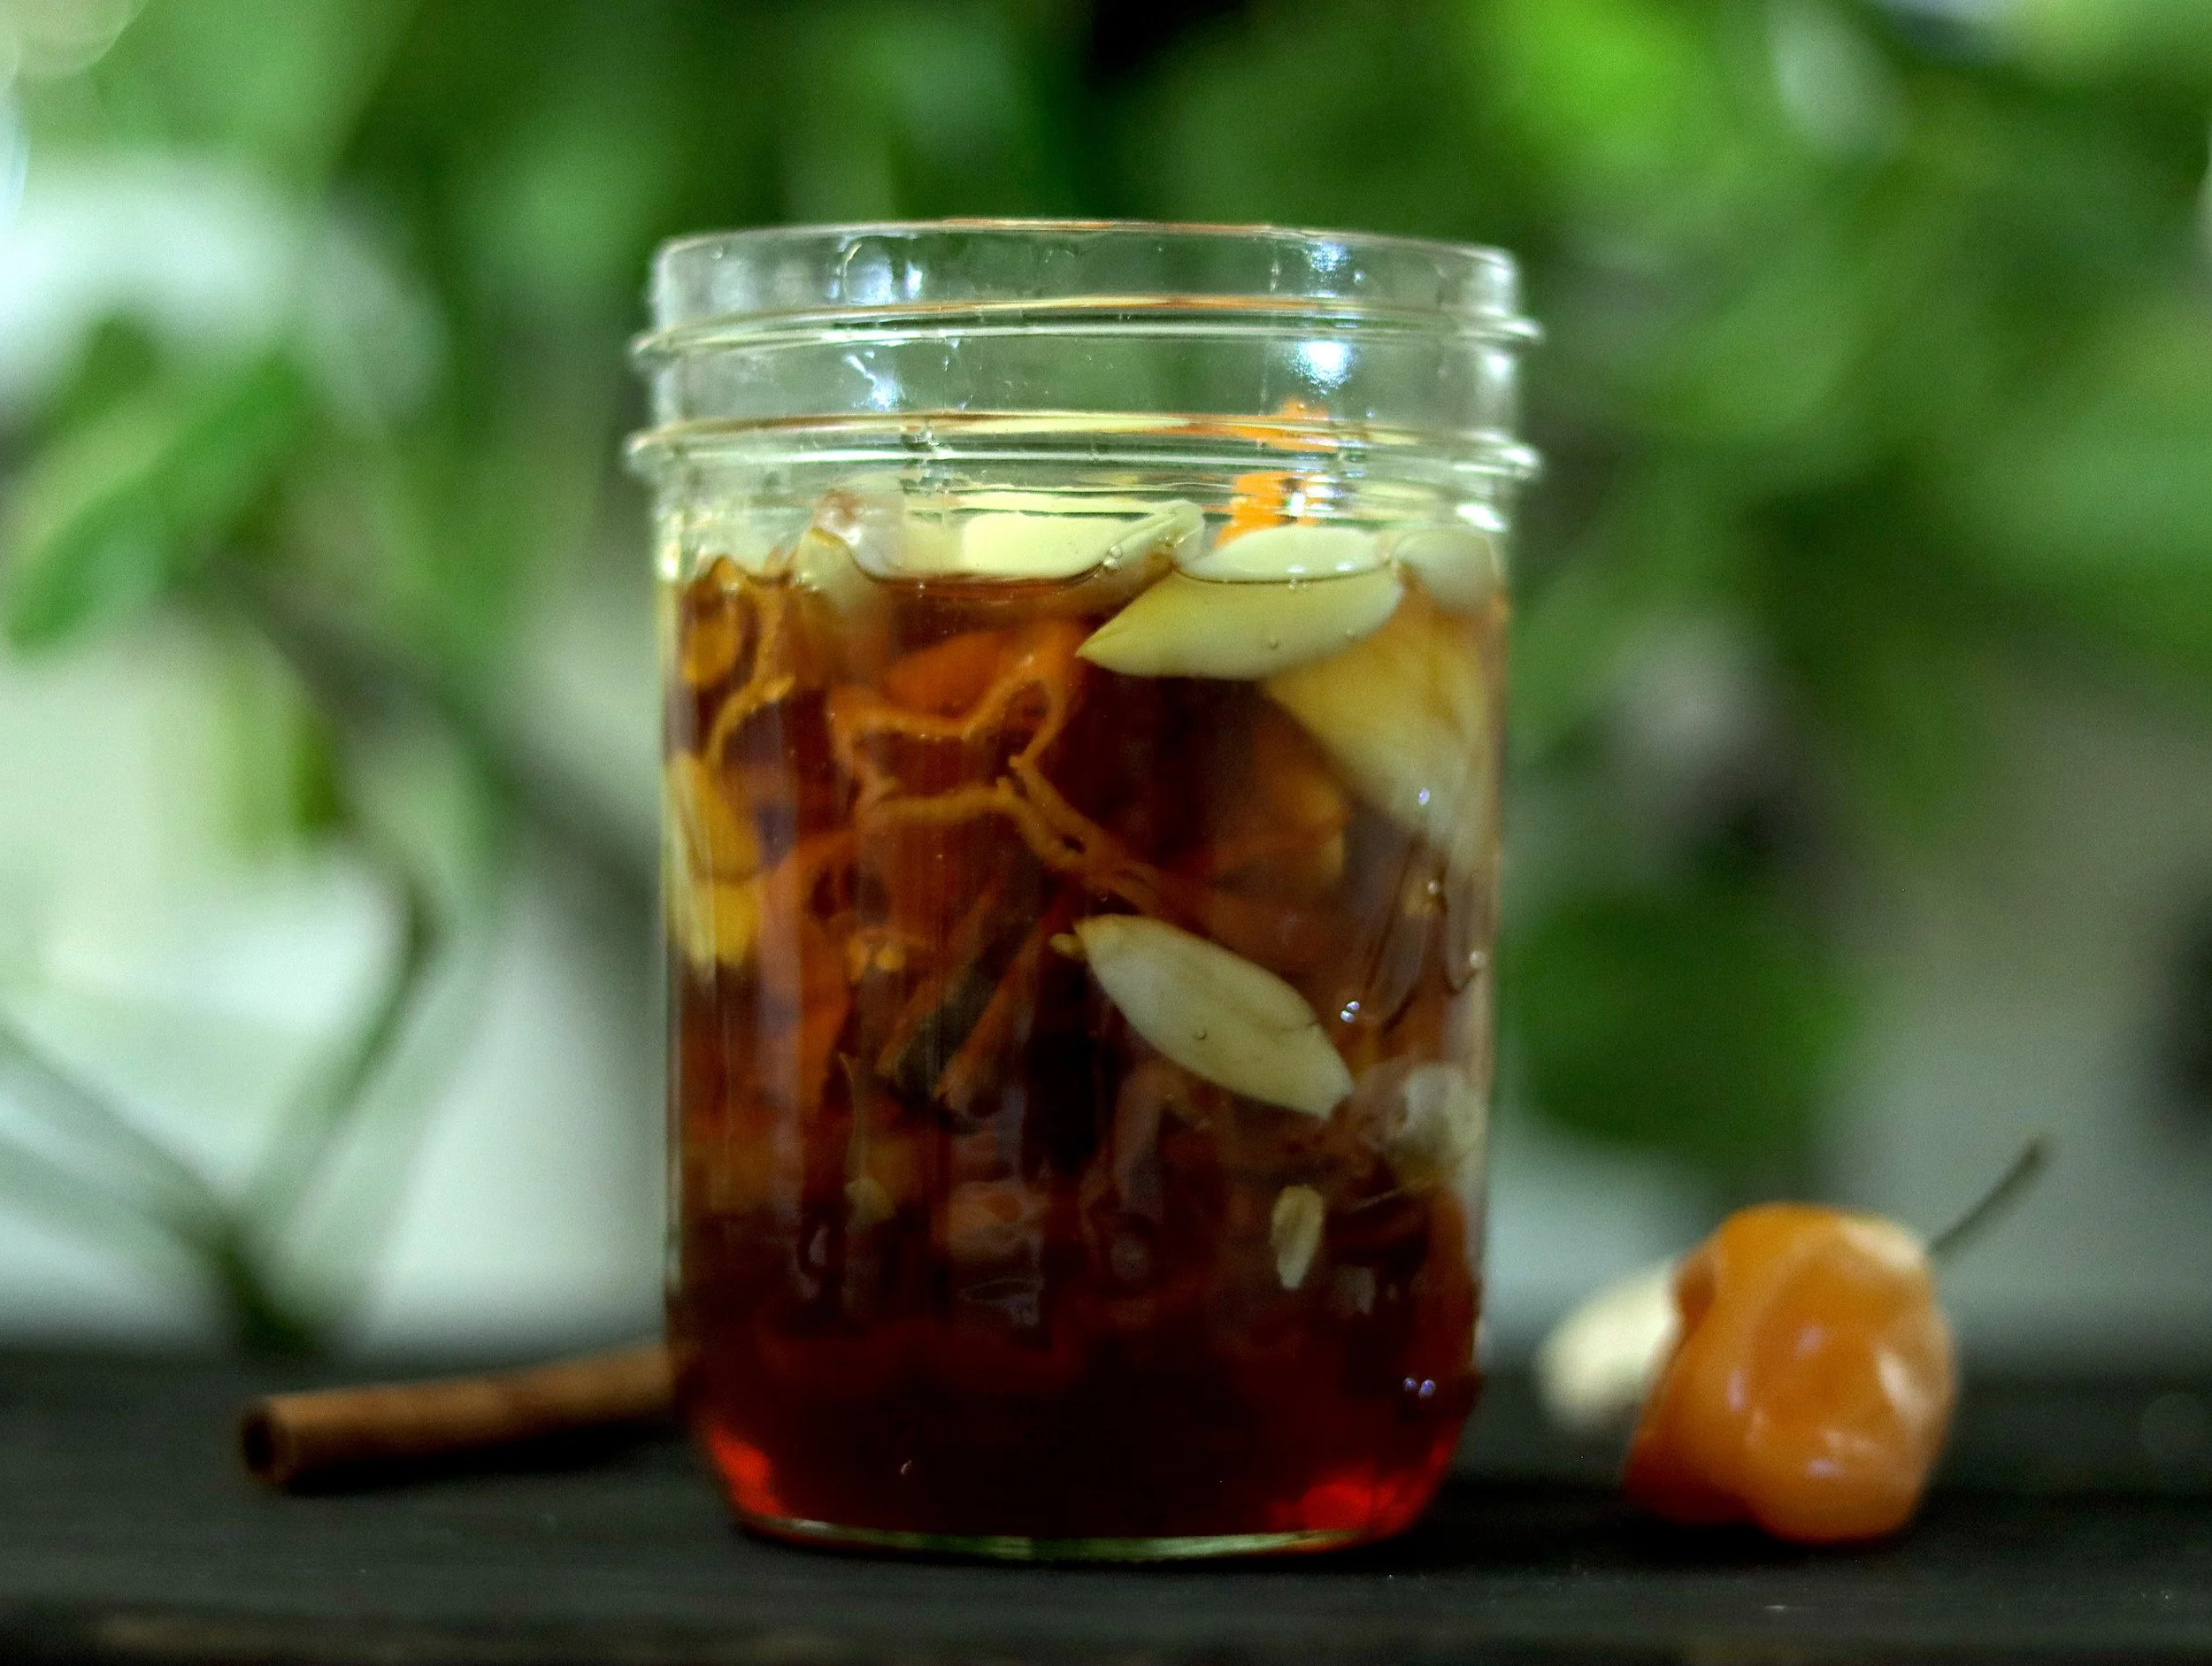
Add the garlic, habanero slices and cinnamon stick the the mason jar. Add the honey unit it is about 2 inches from the jar opening. Label and date the jar. Place the lid onto the jar snuggly.
Place the jar in your pantry or counter top away from direct sunlight. Let ferment for 1 month. During the first week to week and a half you will need to release the pressure from the jar daily. I do this by lightly unscrewing the lid until I hear the pressure get released. You will also get a quick smell of the garlic which is nice! I tip the jar upside down every other day for the entire day so that all cloves of garlic get coated in the honey. Alternatively, you can give this a stir to make sure that all cloves of garlic get coated in the honey. Do this daily as you need to ensure that the cloves of garlic don’t go too long without getting coated with the honey. It is important to not let the garlic not get any honey on it for too long as mold may develop on the garlic and it may not ferment properly. Botulism is a scary bacteria that can result if the fermentation process is not done properly.
After the first week and a half you will most likely not need to release the pressure from the jar. Though if there is still pressure build up, its easy enough to release it. If you have a pH meter, test the pH. The pH needs to be below 4.6 after the first 2 days and after the fermentation period is done. You will still need to stir the garlic in the honey to keep it all coated during the fermentation period.
After 1 month, the fermentation period should be over. Honey garlic will store nicely in your pantry where it stays cool with a tight fitting lid that keeps a good seal. It is important that the pH stays under 4.6. If you want to lower the pH, add a tbsp or two of raw apple cider vinegar. Keep in mind that this will change the flavor slighty. It should stay good at minimum a few months. I’ve had a batch for 8 months now just to see how long it will last. I do recommend checking the pH periodically. I have a digital pH tester that is easy to use and clean. It needs to be less than 4.6 pH to be considered safe to consume. Stir the garlic into the honey at least once a week after the fermentation period is over to make sure no clove of garlic is not coated in the garlic for too long. Since the honey is a lot more thin at this point, I swirl the honey and garlic around in the jar with the lid on instead.
This is amazing in taste. I nibble on the cloves of garlic at least daily and drizzle the honey on foods like pizza, in a peanut butter sandwich and in tea at times! The habanero slices are great on sandwiches, on pizza and of course by themselves. The possibilities are endless on how to use the honey. I recently did a honey and lime glazed baked chicken thigh recipe using this honey that was an absolute banger. When I have the recipe written, I will link it right here.
Enjoy!
Logan